Here's what I have been up to lately. So far since I started making soap the end of May, I have made soap every weekend. I took a break this weekend because I needed to start working on jewelry for my fall & winter shows. I am also going to try and do a show at South Padre Island in Texas during January 2014. Busy times ahead!
So, here are some pictures of the soap I have made and also something wonderful my husband made for me, he is a genius! (Don't tell him I said that, I'll never hear the end of it!)
First I am going to show you the soap I call Chocolate Drops. I used actual cocoa powder (the kind you use to make hot chocolate, put in cakes, etc) for the 'drop' part of it. This was my first time using it, so it's kind of experimental. I don't know yet how it will turn out when using it, so I won't be selling any until I use it myself.
After I cut it into bars, I realized I should have mixed the chocolate part with the uncolored soap. But that's why you experiment, right?
 |
| This wasn't a big batch of soap, which was fine with me since I was doing an experiment anyway. |
 |
| I have cut it into bars and you can see where the chocolate streaked a bit when I sliced them. |
Below are pictures of the Orange Eucalyptus soap I made. It smells wonderful!
 |
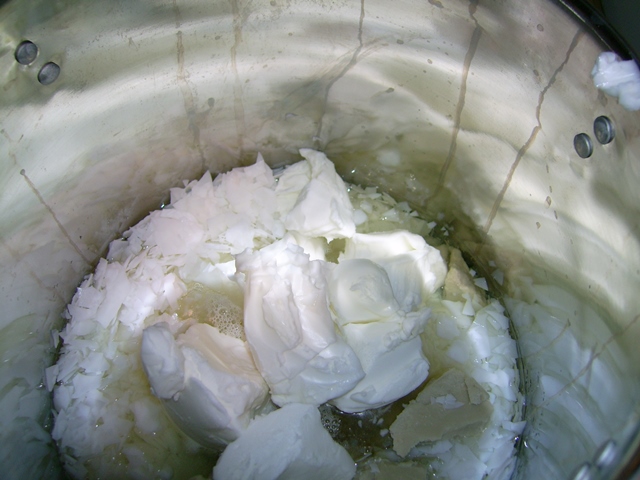
| Here's the pot with my oils I had to melt. The flakes you see are Palm Kernel oil, the solid white blobs are vegetable shortening (think Crisco) and the tan chunks on the right side of the pot are raw, unrefined Shea Butter. |
This soap came out more 'sticky' so I had to let the soap log dry for a week before I cut it. This was probably because I used less lye than I should have. I didn't realize I didn't have enough lye until I had reached the point of no return! Live and learn eh?
 |
| Here's the log after I took it out of the mold. I failed to compact it a bit there on the right side as you can see the holes. |
 |
| Here's a close up of the top of the soap. |
 |
| Here's what my wonderful husband surprised me with when I got home from work on Friday. A soap cutter! Now I can be even more precise when I cut the soap log into bars. I love you honey! |
 |
| Another angle |
 |
| Here I have put the Orange Eucalyptus log in my new soap cutter. You can also see the previous soap I have made that is on the drying rack. I have the Chocolate Drops and Jasmine soap drying here. |
 |
| A closeup before I start cutting. |
 |
| Perfect cut! |
 |
| You can see here where I have cut the soap into even bars. |
 |
| I've added the new Orange Eucalyptus soap to the drying rack. It was somewhat dry on the outside, but when I cut into the soap, it was a bit sticky. I think I'll have to let these dry for about 6 weeks instead of 4 weeks. |
 |
| Another angle. You see the Jasmine soap in the foreground. I have some labels I printed out from some brown grocery bags that are ready to be trimmed. |
I am using brown grocery bags to print my labels. No only am I recycling, but I also like the paper wrappers being heavier than regular paper. That scroll-work design color will change depending on the soap it's wrapped in. For instance, when I make lavender soap, I'll be doing them in purple.


